

Prerequisites
- Plan: Scale, Advanced, or Enterprise.
- Access: OAuth apps are in early access. If you don’t see OAuth App under New App in Manage Apps, ask your Affinity contact to turn it on for your organization.
- Permission:
Manage all OAuth apps. By default, only Administrators have it. - IP allowlist: to set one, you may also need the
Manage IP allowlistpermission.
Create the app
- In Affinity, go to Settings → Manage Apps.
- Click New App, then OAuth App. If you can’t create API keys, the button is called New OAuth App instead.
- Enter a Name and a Description. Your users see the name on the consent screen.
- Choose the Client type (the default is Public):
- Public is for apps whose code runs on the user’s device, such as mobile, desktop or single-page apps, or anywhere else the code ships to the user. A public client has no secret and must use PKCE.
- Confidential is for a server you control, where a secret can stay private. You get a client secret, shown once.
- Enter one Redirect URI per line, as a full URL such as
https://example.com/callback. - Choose the Allowed scopes, which decide what the app can do for your users. Pick at least one.
- Optionally, set an API version, an IP allowlist, an icon and a website URL.
- Click Create.
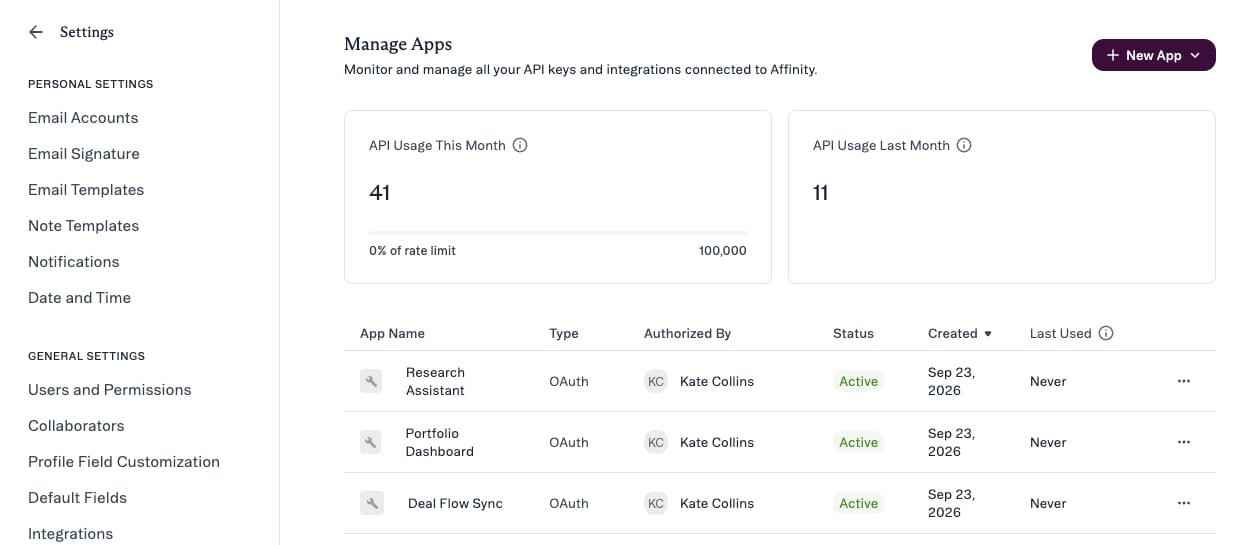
Manage Apps lists your API keys and your OAuth apps in one table.
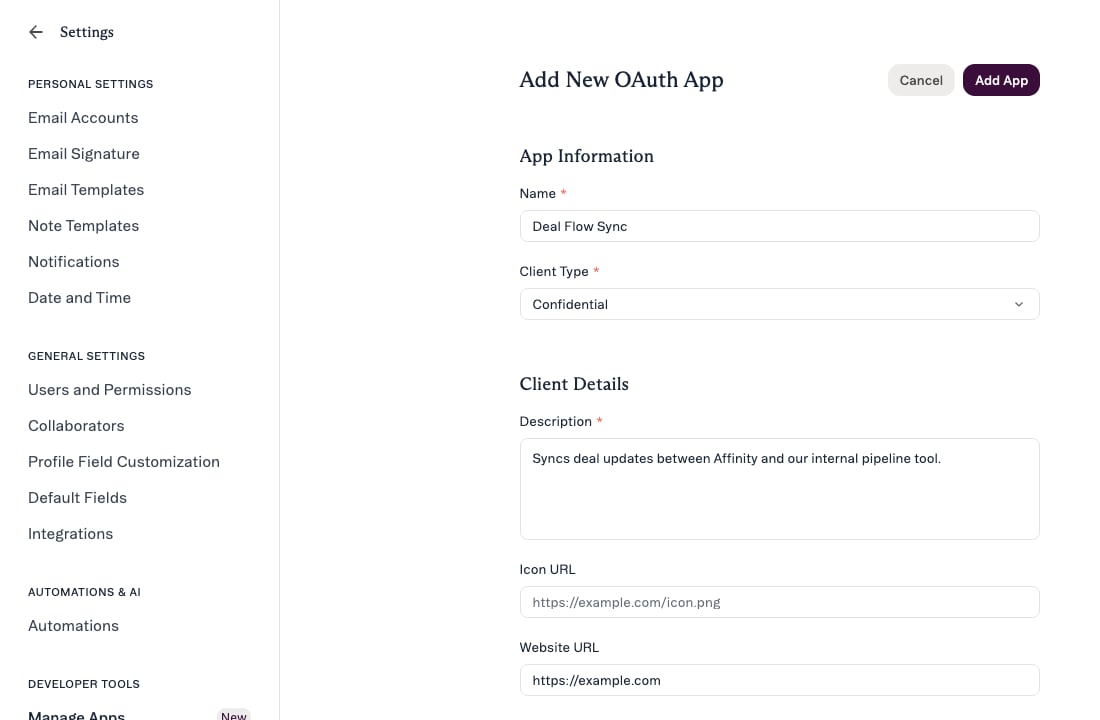
The app creation form: name and client type.
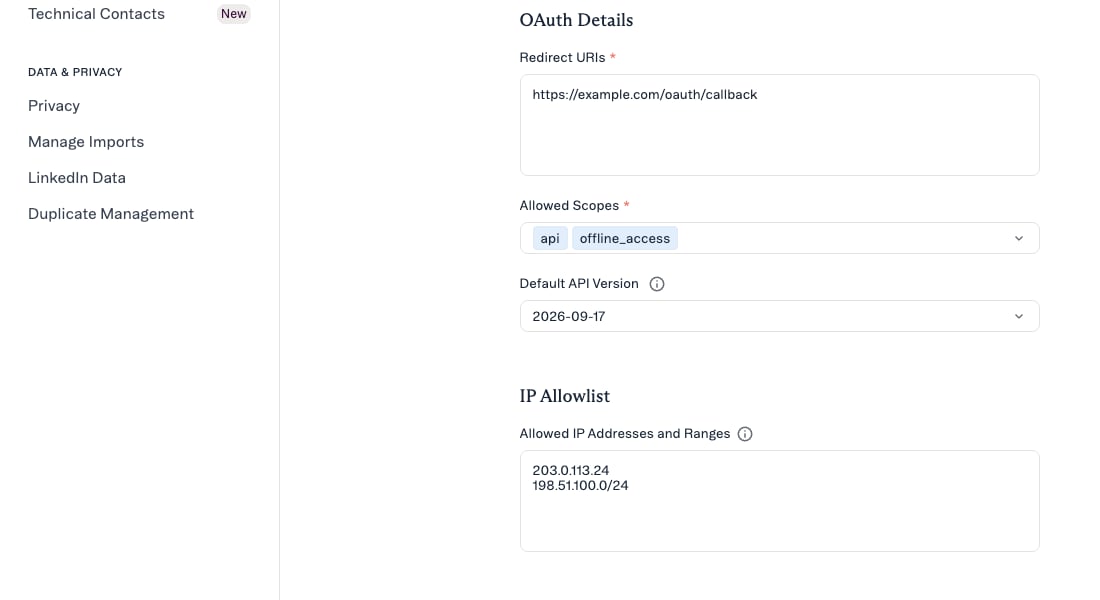
Redirect URIs, allowed scopes and the IP allowlist, further down the same form.
1f0c2b7a-3d4e-4a1b-9c8d-5e6f70819aa2.
A confidential app shows its client secret only once. Copy it and store it like a password.
Affinity keeps only a hash, so you can’t view it again or rotate it. If you lose it, you’ll need
to delete the app and create a new one, which disconnects every user.
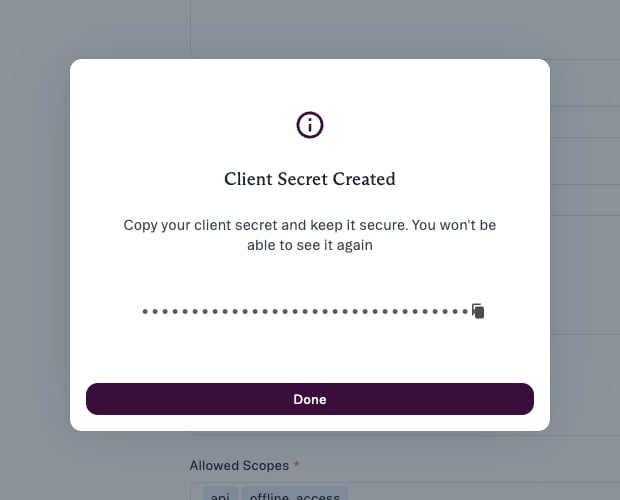
Affinity shows the client secret once.
MCP clients with a metadata URL (CIMD)
Some MCP clients don’t need you to create an app. Instead, theirclient_id is a URL that points to a
JSON file about the client, called a Client ID Metadata Document (CIMD). For example, Claude uses
https://claude.ai/oauth/mcp-oauth-client-metadata.
Built-in MCP clients
Clients such as Claude, ChatGPT and Notion are already set up. You can turn each one on or off in Settings → Affinity MCP. For setup steps, see Supported clients.Add an MCP client by its Client URL (CIMD)
To use another MCP client with a metadata URL, add it in Manage Apps.Adding a client by its Client URL (CIMD) is in early access. If you don’t see Client URL (CIMD)
under New App in Manage Apps, ask your Affinity contact to turn it on.
- Go to Settings → Manage Apps, click New App, then Client URL (CIMD). If you can’t create API keys, click Add by Client URL (CIMD) instead.
- Paste the client’s metadata URL, such as
https://acme.example.com/oauth/client.json, and click Preview. - Review the preview. Check the hostname: the name and logo come from the vendor, so anyone can set them. You’ll also see a warning if every redirect URI is on localhost.
- Optionally, narrow the Allowed Scopes or add an IP Allowlist.
- Click Add App. Your users can now sign in with the client.
CIMD metadata document requirements
If you build an MCP client, your metadata document must:- Be served over
httpsat the exact URL you use asclient_id, with no redirects, and respond within 5 seconds. - Set
client_idto that same URL. - Include
client_nameand at least oneredirect_urisentry. - Use redirect URIs on the same registrable domain as the
client_id, or on localhost. For example, aclient_idonapp.acme.example.comcan redirect tohttps://auth.acme.example.com/callbackorhttp://127.0.0.1/callback. - Include
codeinresponse_types, if you set it. - Set
token_endpoint_auth_methodtononeorprivate_key_jwt. Either way, Affinity treats the client as public: it uses PKCE and has no client secret.
Scopes
api doesn’t grant mcp, so ask for mcp if your app talks to the MCP server.
If you leave out the scope parameter when authorizing, Affinity grants every scope the app is
approved for. Ask only for the scopes you need.
Authorize a user
Send the user to the authorize endpoint. A public client must include the PKCE parameters, and a confidential client can leave them out.code and state. Users can uncheck scopes before allowing, so check the scope
field in the token response instead of assuming you got everything you asked for.
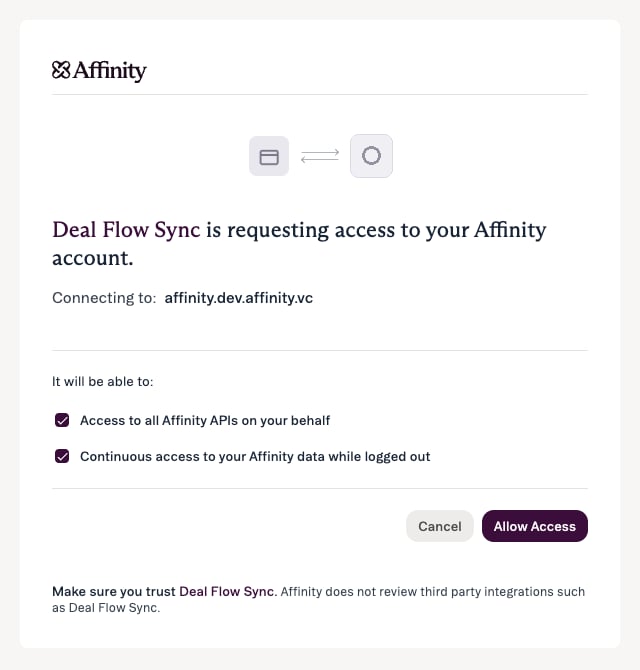
The consent screen. Your users can uncheck a scope before allowing access.
response_typemust becode, since it’s the only supported flow.redirect_urimust exactly match a registered URI. Onlylocalhost,127.0.0.1and[::1]can use a different port.- PKCE supports
S256only, notplain. - A public app must send PKCE. A confidential app can send it too, but then it must also send the verifier in the next step.
- The code expires after 5 minutes and can only be used once.
Exchange the code for tokens
A public client sendsclient_id and code_verifier in the request body. A confidential client
uses HTTP Basic authentication, with the client ID as the username and the client secret as the
password.
client_id and client_secret as form fields, but if the
Basic header is present, Affinity ignores them. If the client sent a PKCE challenge when authorizing,
it must also send code_verifier here.
The response looks like this:
Refresh a token
Call the API
api.read, and endpoints that change data need api. Some read-only
endpoints use POST, such as POST /v2/notes/search.
API version
For each request, Affinity picks the API version in this order:- The
X-Affinity-Api-Versionheader. - The app’s pinned version.
2024-01-01, the oldest published version.
400 with a validation error on the header. See
Versioning for the published versions.
Discovery
Affinity publishes its OAuth metadata athttps://login.affinity.co/.well-known/oauth-authorization-server, and its signing keys at
https://login.affinity.co/.well-known/jwks.json. Clients that read RFC 8414 metadata don’t need
any endpoint configuration.
Connect the app to the Affinity MCP server
Your OAuth app can also call the hosted Affinity MCP server athttps://mcp.affinity.co/mcp.
- Give the app the
mcpscope, ormcp.readfor read-only access. Addoffline_accessif the client runs in the background. - Point your MCP client at
https://mcp.affinity.co/mcp. - The client reads
https://mcp.affinity.co/.well-known/oauth-protected-resource/mcp, findshttps://login.affinity.coand runs the flow above.
Restrict the app to known IP addresses
With an IP allowlist, the app accepts calls only from the addresses you list.- Add up to 100 entries, each an IPv4 address, IPv6 address or CIDR range.
- Leave the list empty to allow any address.
- Calls from other addresses return
403withAccess denied. - The allowlist applies only to Affinity API v2, not to the older v1 API.
Rate limits
OAuth apps share the same per-user, per-organization and concurrent limits as API keys, and get the same rate limit headers. When you go over a limit, the API returns429. See
Rate limits for the current values.
Errors
Manage the app
Go to Settings → Manage Apps and click the app. The detail page shows the client ID, redirect URIs, scopes, allowed IPs, authentication method, creator and pinned version.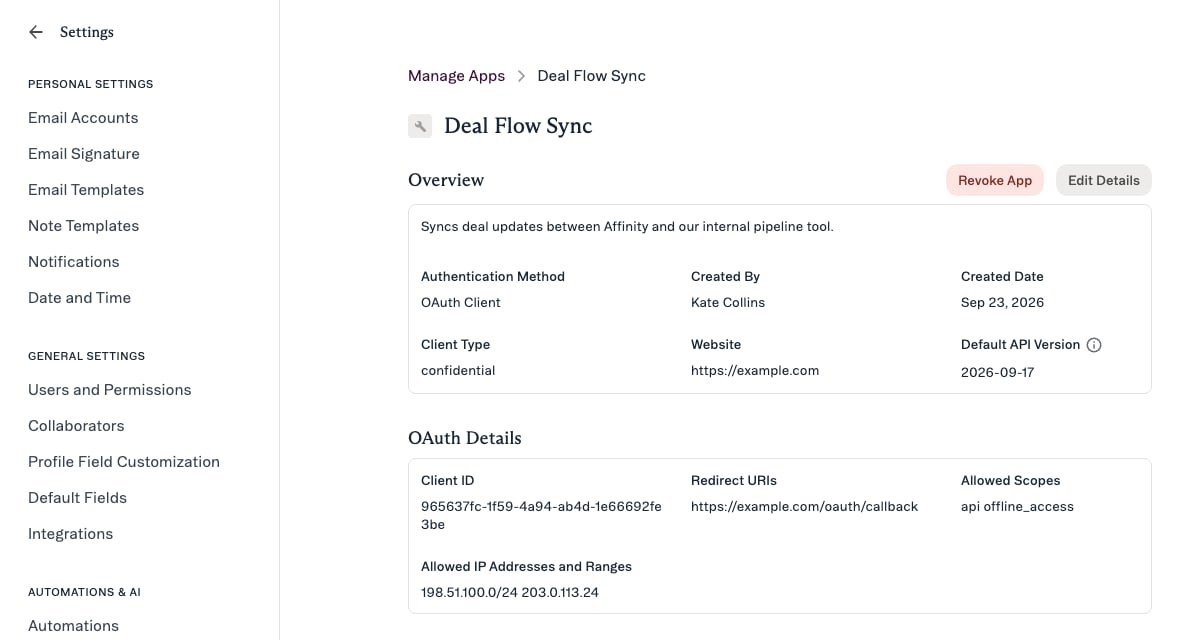
The app detail page: client ID, redirect URIs, scopes, allowed IPs and the pinned API version.
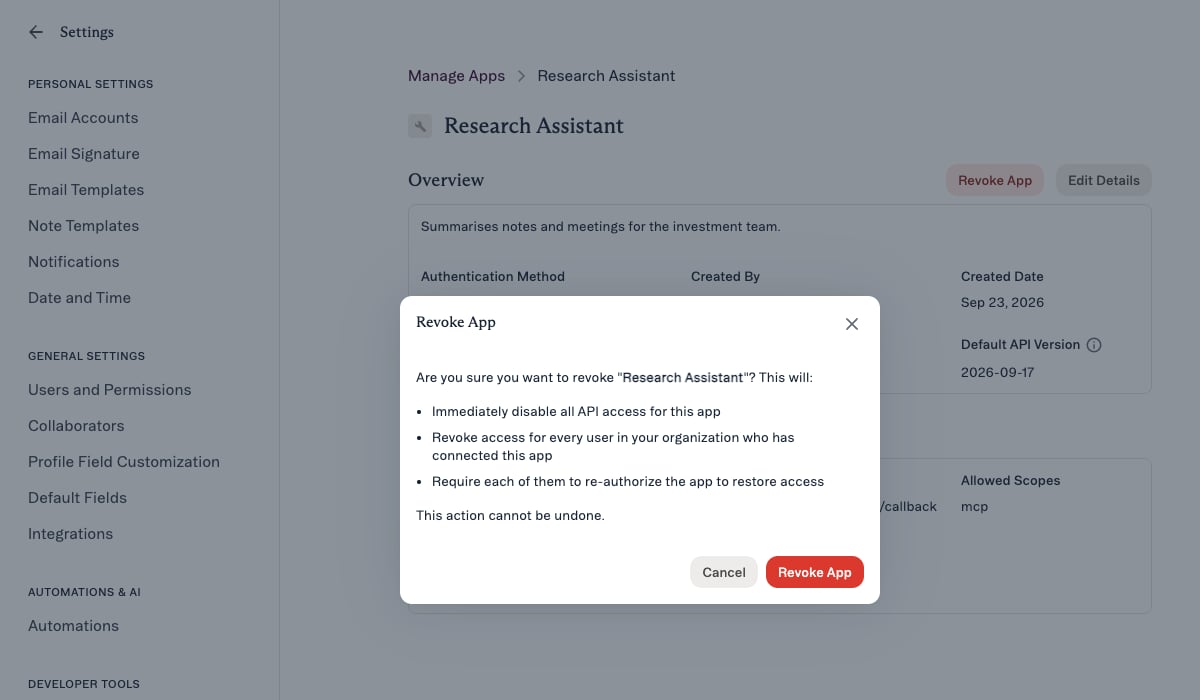
Revoking disconnects every user.
Current limits
- There’s no token revocation endpoint. A token stops working when it expires, the user disconnects
the app, or the app is revoked. Without
offline_access, it also stops when the user signs out of Affinity.