> ## Documentation Index
> Fetch the complete documentation index at: https://developer.affinity.co/llms.txt
> Use this file to discover all available pages before exploring further.
# Authentication
> Learn how to authenticate with the Affinity MCP Server
The Affinity MCP Server supports two authentication methods: **OAuth** (recommended for supported
clients) and **API key**.
## OAuth (Recommended)
OAuth authentication is only supported with the **hosted MCP server** (`https://mcp.affinity.co/mcp`). If you are running a self-hosted MCP server, use API key authentication instead.
OAuth is the preferred way to connect to the Affinity MCP Server. It provides a secure,
token-based connection without requiring you to manage API keys manually, and is supported by
Claude (Desktop, Web, and CLI), Notion, and ChatGPT.
### Authorizing Access
When you connect a supported client for the first time, you'll be redirected to Affinity to
authorize access. The OAuth consent screen shows the permissions being requested:
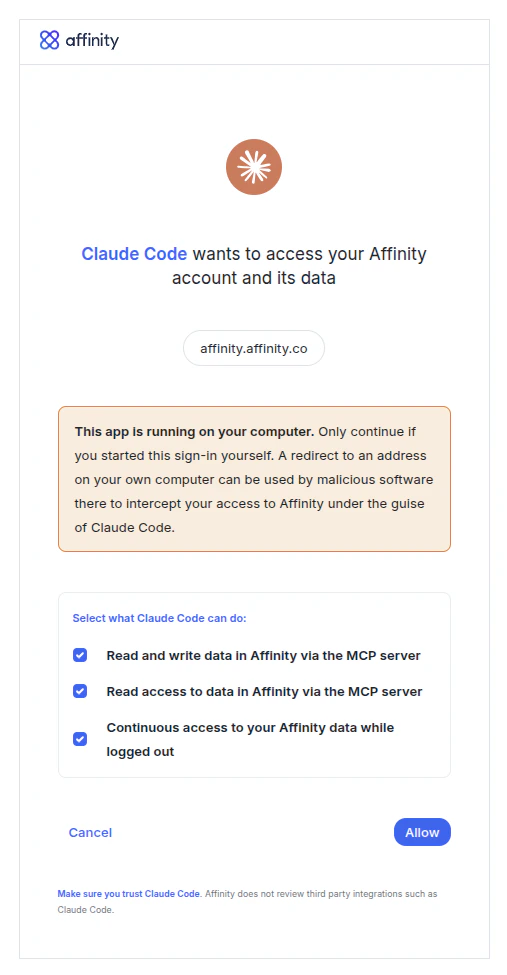 By default, the MCP server requests both read and write access. If you want to grant **read-only
access** so the MCP server can look up data but not modify anything, uncheck the
first scope before clicking **Allow**.
### Managing OAuth Clients
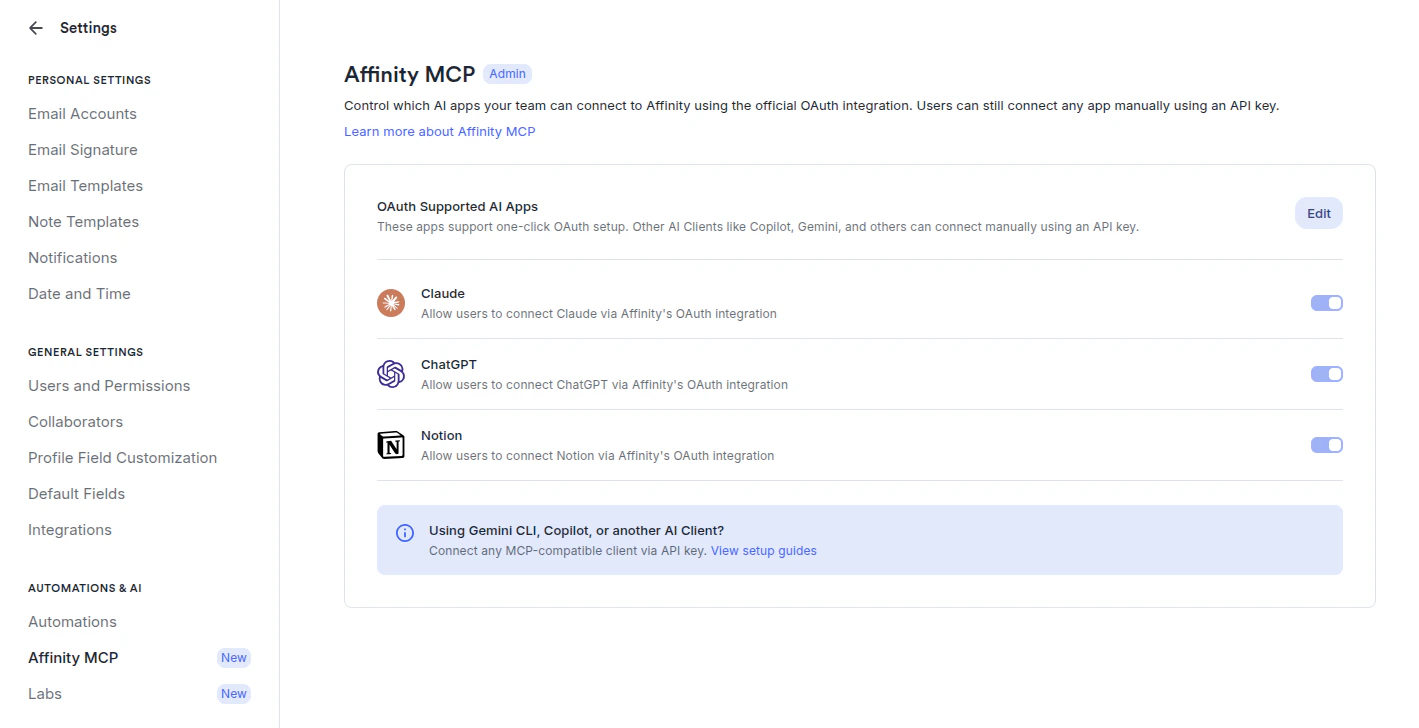
Any admin can view and disable OAuth access for each client by navigating to **Settings** →
**Affinity MCP**. These settings apply organization-wide for all users. On Enterprise plans,
admins can scope this capability to specific roles via **Settings** → **Users and Permissions**
→ **Roles** → **Manage MCP Agents**.
By default, the MCP server requests both read and write access. If you want to grant **read-only
access** so the MCP server can look up data but not modify anything, uncheck the
first scope before clicking **Allow**.
### Managing OAuth Clients
Any admin can view and disable OAuth access for each client by navigating to **Settings** →
**Affinity MCP**. These settings apply organization-wide for all users. On Enterprise plans,
admins can scope this capability to specific roles via **Settings** → **Users and Permissions**
→ **Roles** → **Manage MCP Agents**.
 ## API Key
For clients that don't support OAuth, or if you prefer to authenticate with a key directly,
generate an Affinity API key and pass it as a Bearer token in your client configuration.
### Obtaining Your API Key
1. Log in to your Affinity account
2. Navigate to **Settings** → **Manage Apps**
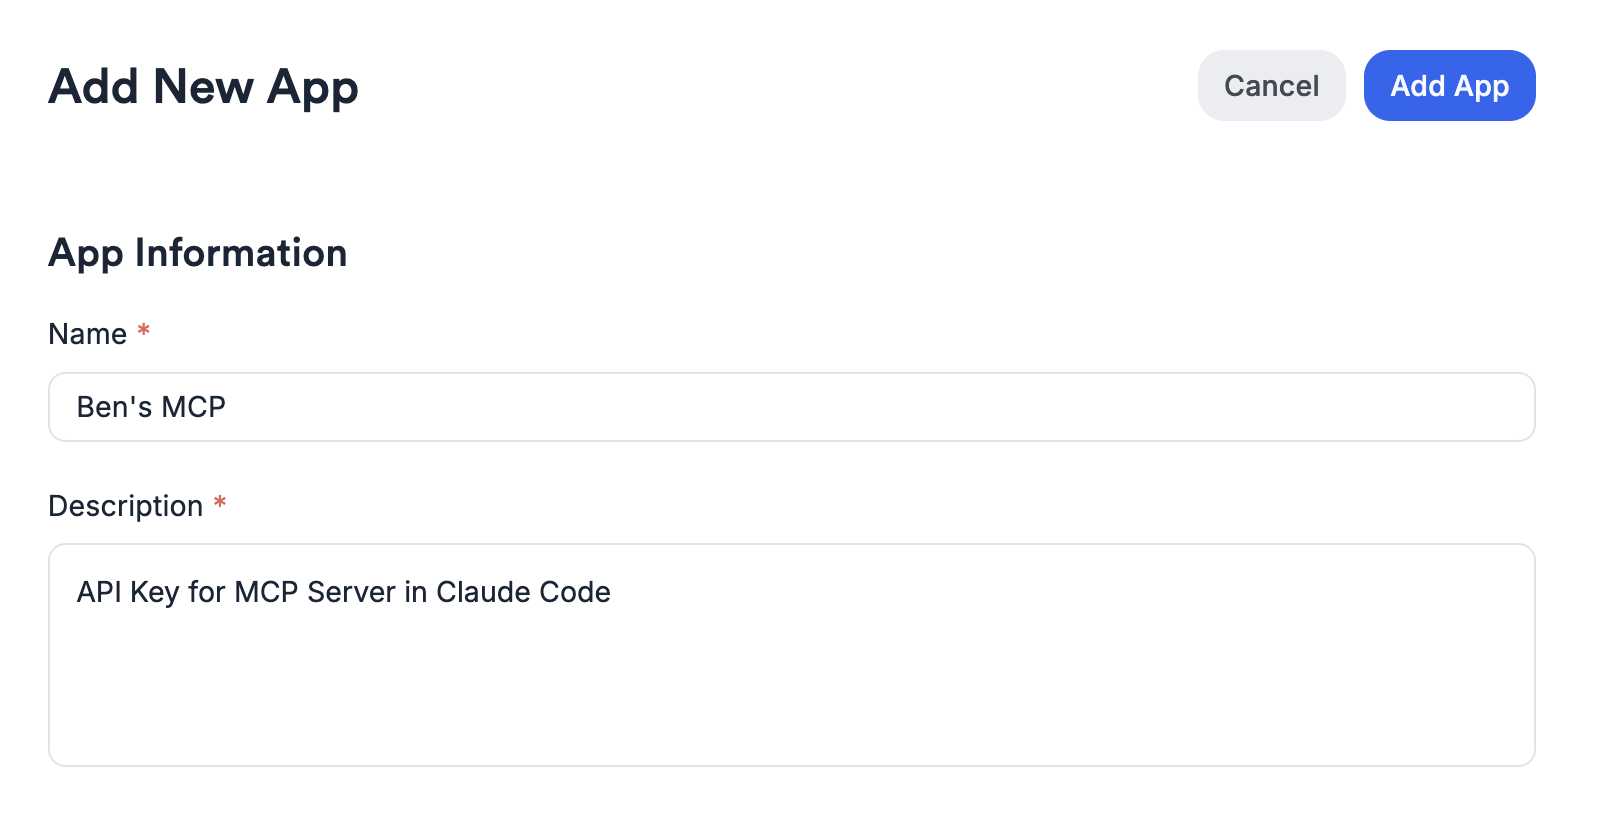
3. Click **New App** and enter a name (e.g. *John's MCP*) and a description (e.g. *API key for my MCP server connected to Claude*). API version and IP Allowlist can be left blank.
4. Copy the generated API key
## API Key
For clients that don't support OAuth, or if you prefer to authenticate with a key directly,
generate an Affinity API key and pass it as a Bearer token in your client configuration.
### Obtaining Your API Key
1. Log in to your Affinity account
2. Navigate to **Settings** → **Manage Apps**
3. Click **New App** and enter a name (e.g. *John's MCP*) and a description (e.g. *API key for my MCP server connected to Claude*). API version and IP Allowlist can be left blank.
4. Copy the generated API key